
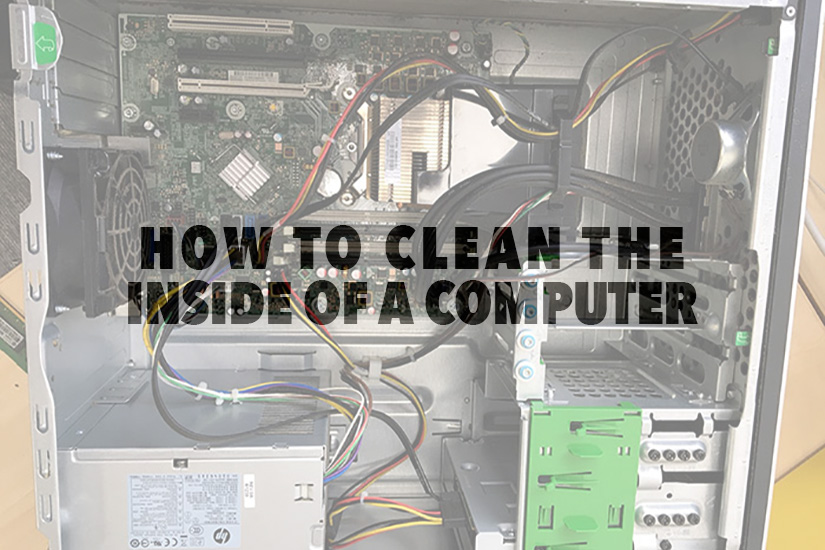
Here at LoopCR Ltd we receive a lot of computers that have either stopped working or fail intermittently. A common issue we investigate first often shows the problem to be caused by a build-up of dust inside the computer, covering vital components.
Dust has been a problem for computers from the beginning. After all, the original computer bug (and corresponding phase) was found to be a moth that had got into a computer.
We have found the main issues that dust (and smoke, pet hair or similar) cause are:
- Noise
- Overheating
- Chip creep
Noise is caused by dust building up on the blades of cooling fans. This can make the blades unbalanced leading to noise or in extreme cases, can wear out the bearings in the fans. This will also apply to the power supply.
Overheating is caused by air vents being blocked which interrupts the air flow through the computer. Overheating is also caused by the insulating effects of the dust. Again power supplies will be affected.
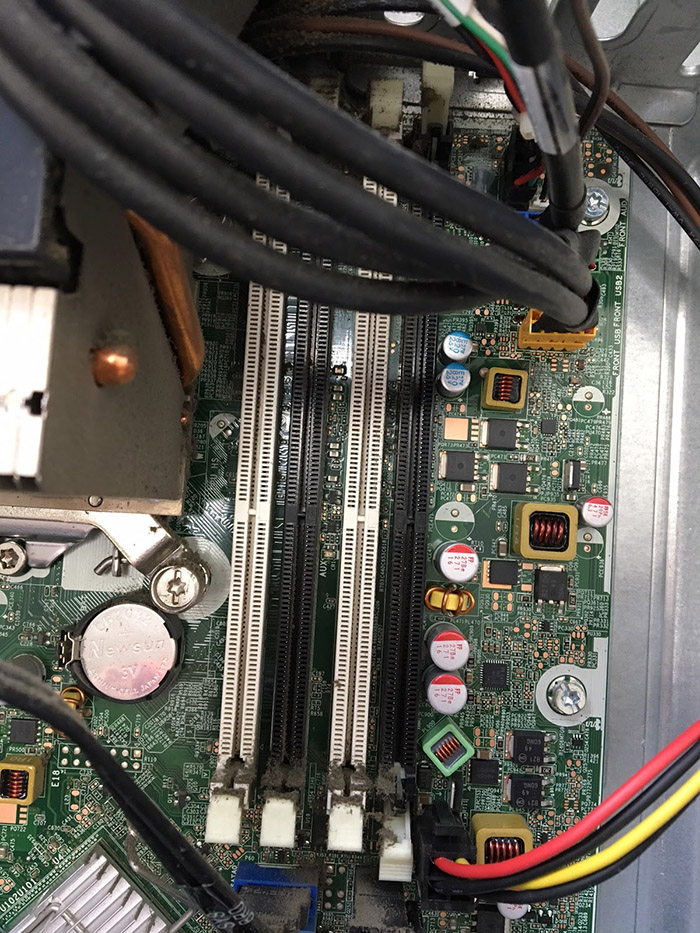
Chip creep is a component (usually a RAM chip) working it’s way out of its socket. It is caused by the chip expanding and contracting during use. Over time the chip will stop making contact with the connector. If this happens to the RAM (memory) chips the computer will stop working.
We always recommend to clients and individuals to spring clean their computers, this doesn’t have to be a weekly or monthly exercise but it will help every so often to remove the debris and particles of dust collecting up. Here are a few top tips on how we believe you can clean your computer (please note this isn’t a definitive guide, these are created for general purpose cleaning):
Our Top Tips On How To Clean Your Desktop Computer:
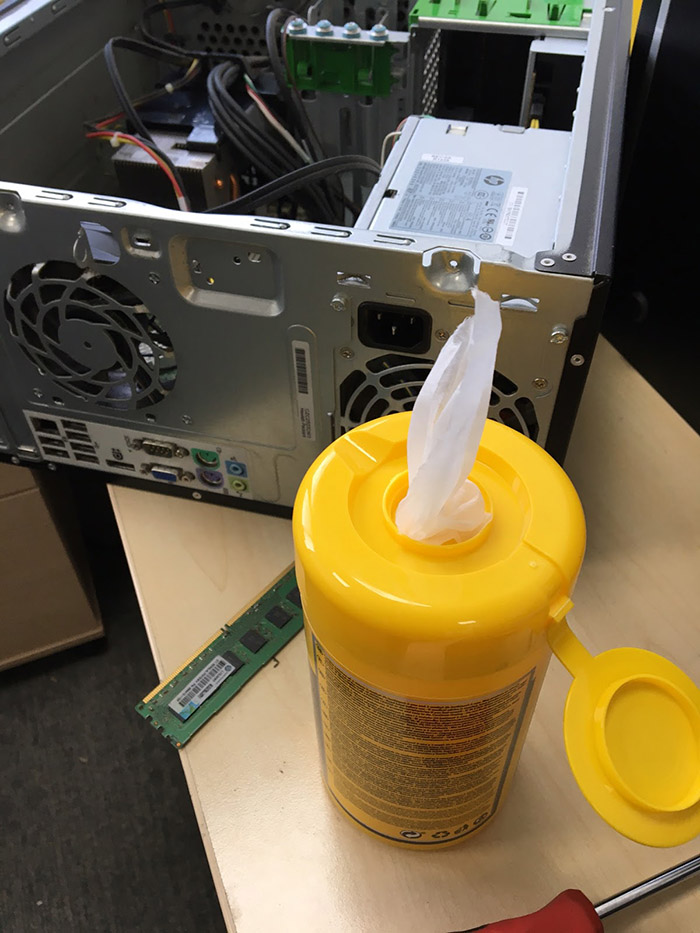
We advise using a can of compressed air and a cleaning cloth to remove the dust, you will also likely need a screwdriver to access your PC’s case. A pen/pencil and zip-ties will potentially be useful as well. Utilise the following steps on a regular basis to ensure optimal PC performance and avoid overheating:
Step 1:
Refrain from opening your computer when it is switched on or has power cables connected, as there is a risk of static shocks and even spinning fan blades. Technically a connected power cable does ‘ground’ the computer, but any residual moisture from a can of compressed air will cause trouble if the PC is receiving electrical current.

Step 2:
Ensure you are working in a well ventilated area – this will prevent the excessive inhalation of dust and also will help avoid dirt resettling on/in the PC as you clean.
Step 3:
We recommend the combined use of compressed air and a cleaning cloth for removing dust, do not use a hoover on the inside of your PC as it can cause static build up and potentially ruin components.
Step 4:
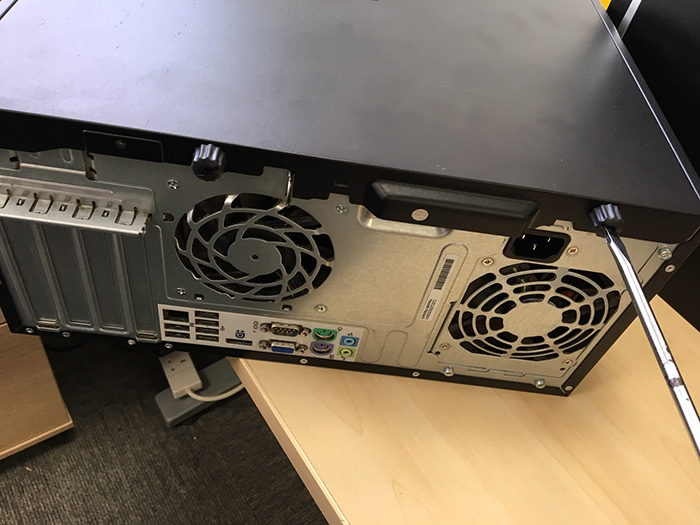
Open your computer casing, most require the simple removal of two screws at the rear and will unclip/slide right off. If you cannot access your computer then consult the manual.
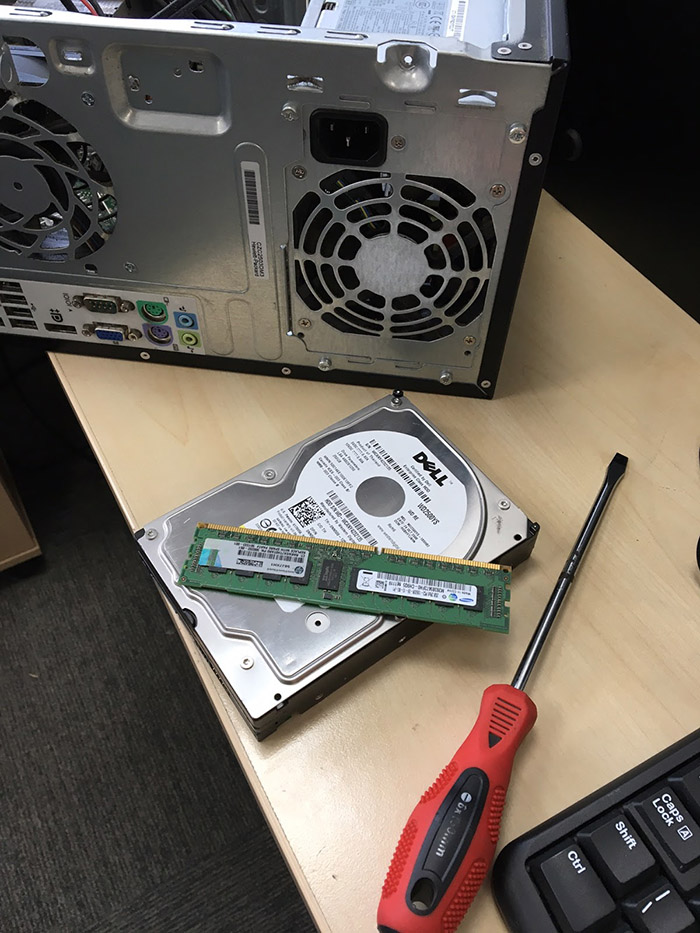
Step 5:
In order to clean more thoroughly, remove your hard drive as well as any sticks of RAM and other extension cards (video/graphics cards). If possible, place these items on an anti-static surface to ensure they are fully protected. Do not remove the central processing unit (CPU) because a new layer of thermal paste will need to be applied to the processor upon re-fitting. If you have access to thermal paste and are confident re-applying it then removing the CPU will also enable you to clean more thoroughly.
Step 6:
With regards to the actual cleaning technique we recommend aiming your canister of compressed air at any dust build-ups, blowing it into a more accessible space then using the cloth to remove dirt easily from open areas.
Step 7:
Start by cleaning the extension items that you have just removed (RAM, hard drive, video cards, etc).
Step 8:
Once you have cleaned the peripheral items move inside your computer case. We advise using your compressed air to pay particular attention to RAM and other power slots, as these awkward spaces are hot spots for dirt build-up and emphasis on these areas can prevent the aforementioned chip creep.
Step 9:
We have found a useful tip for cleaning your CPU fan and power supply is to use a pen/pencil to hold blades still whilst you blow compressed air through the gaps in the ventilation.
Step 10:
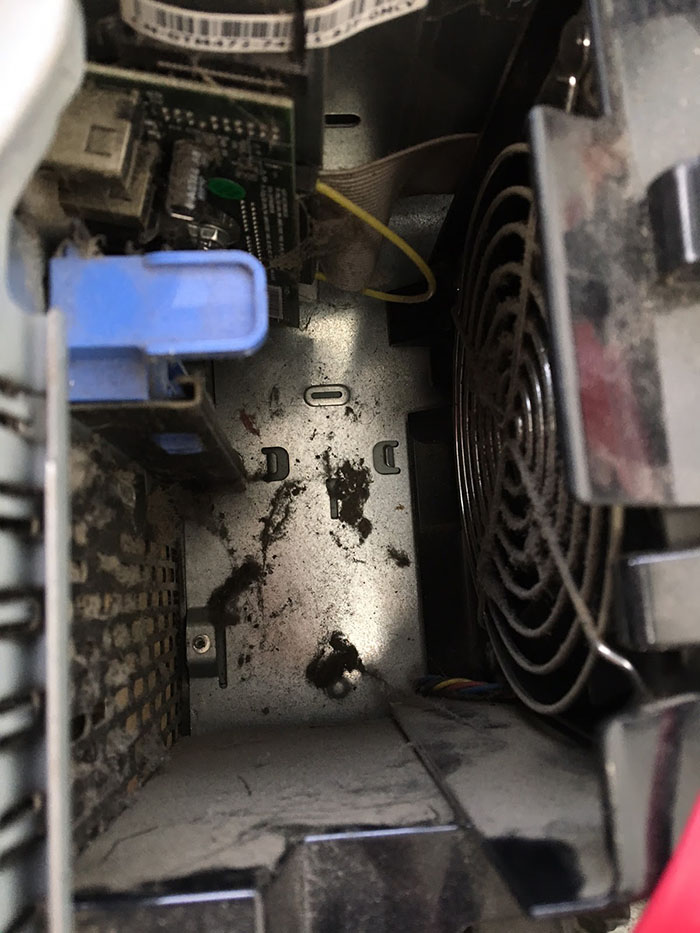
The base of your computer case is highly likely to have dust build up and can be cleaned easily with a damp (ensure this is not fully wet) cloth, as even dirt in seemingly open spaces can become the cause of overheating.
Step 11:
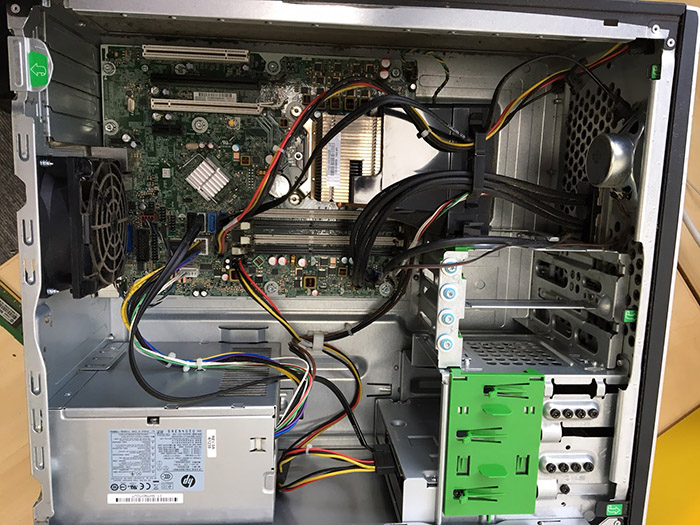
Finally, use zip-ties to tidy up your PC’s cabling, this will look tidier and prevent components from rubbing on one-another – which can potentially cause overheating or increased wear. Neatly organised cables will also decrease both the surface area and number of nooks and crannies for dust to build up in originally, as well as being aesthetically pleasing the next time you come to clean your computer.
Step 12:
Return all extension devices such as your hard drive and RAM to their appropriate slots, if you are not confident on placement then taking photographs/notes on their positioning at the beginning of the process can ensure that you return your PC to full working order on the first attempt.
Step 13:
If you are looking to clean your laptop and its components we recommend sticking to the same basic principals, however bear in mind that due to their compact nature it will be a more cramped/fiddly process. To counteract this complication it is worth noting down exact screw, component and wiring positions manually on a piece of paper before beginning to clean.
It is not necessary to clean your PC on a weekly basis, however if this step-by-step process is applied once every 3-6 months it will ensure consistent performance and prevent overheating, potentially extending the life-span of your computer significantly.